Saturday Morning Tea

I think I mentioned this before but one of the experiences I love the most about springtime besides all of the colorful blooms, is the arrival of the first flush Darjeelings. This morning I am sipping a cup of Arya estate Aroma Darjeeling. The Arya tea garden is located in the Darjeeling district in northeast India. I wrote a little about its history in a former post. To me, its name even conjures up images of a fairytale kingdom high in the misty mountains.

I was so excited to find this intact large leaf in my cup. The color and quality of the leaf is outstanding. The amber colored liquor smells like delicate fruit and flowers and its taste fills my mouth with a slight hint of sweet bananas and other tropical fruits. A heavenly treat to start out the long holiday weekend.

Today I am attending my polymer clay guild meeting where I will try and get some work done on my March journal page. “Try” is the key word here as I will probably be visiting and sharing with my fellow guild members for the first few hours! A veritable gab fest, if you know what I mean. I’ll post a photo soon of the progress I make today on my page.

More Progress on my March Beaded Journal Page

Here’s a peek at the progress I’ve made on my March journal page. I enjoy creating the texture of the tree bark. As I bead each twist and turn, I contemplate all of the twists and turns I’ve taken in my life up to where I am right now. I think I will make some fringy roots that will hang free. As I’ve only been in my new home for 3 weeks, I’m not feeling especially rooted right now.

March Beaded Journal Page in progress

As I have been slowly but surely unpacking my art supplies from my move a couple of weeks ago, I found my March page neatly wrapped up in one of my moving boxes. I had gotten as far as placing the polymer clay glazed face cabochons created at my January guild meeting on the fabric and then had stopped around mid-March so I could pack everything up. I was so delighted to finally find my page and sat down almost immediately to give each face a beaded bezel. I used the “barnacle” technique as explained on page 50 in Robin Atkins wonderful new book called “Heart to Hands Bead Embroidery”.

Back in March when I was so looking forward to Spring’s arrival after a long cold winter, I found myself studying trees very closely to see any signs of Spring. In one of my meditations, an image popped into my mind of each knot in a tree having a face in it that was waking up from a long winter’s sleep. Shortly after that I was purging some old magazines and found this image.

It reminded me so much of my image of the faces in the tree. The feeling I want to convey with this piece is one of an organic awakening. Robin has another bead technique on making twisted tree trunks (page 67). I think this beading technique will be perfect for the look I want. Stay tuned for more progress!

The Birth of a Studio, Part 3

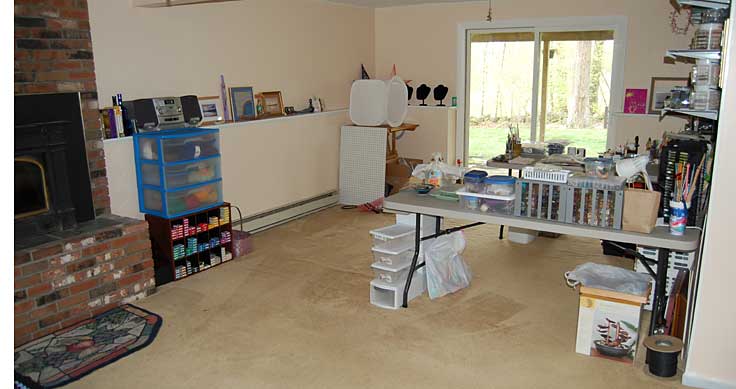
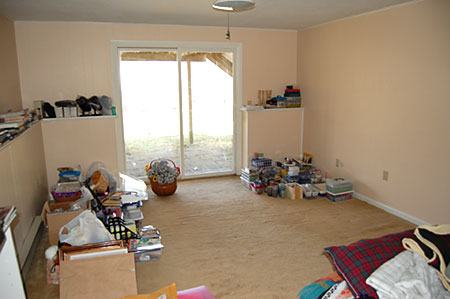
I worked most of the day yesterday organizing and finding a place for everything in my new studio space. I am feasting my eyes on this new creation as often as I can because a) I can’t believe that one of my dreams has finally come true and b) I don’t think it’s ever going to be this clean again. There’s even vacuum marks on the rug! The rug…..which is probably the one thing about the space I don’t like. I have visions of spilling a tray of beads and……..oh dear…….well, you can imagine the rest. Maybe someday we can install a ceramic floor or even a hardwood floor down here.

The space in front of the heater on the far wall is where I want to put my metalworking table. I have a few options I’m looking at, including an offer to have a table made for me!

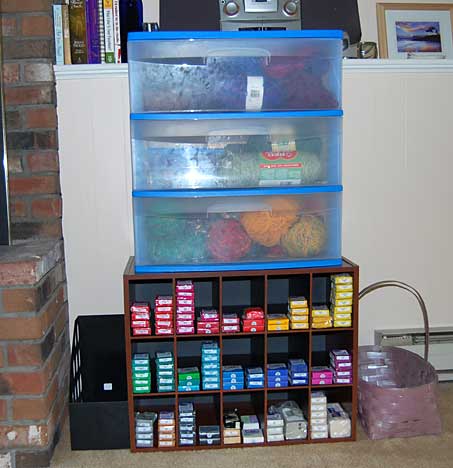
Here is the beadworking area. I was able to fit all of my beads on the shelves and portable storage units for easy access.

My good friend Amy, who has a fabulous studio BTW, told me about this nifty cube storage unit that’s perfect for organizing polymer clay. I just loved sorting the little squares by color and lining them all up in neat rows. Thank you, Amy!

My light tent has found its home on a drafting desk in the corner. The box under the table contains the lights, waiting to be set up. The pegboard leaning against the left side of the table will eventually be screwed into the wall above the heater, I think. So, my tools will be hanging behind me. I’m not sure how that will work out but I’m going to try it out because I can’t place the table against the heater. My sewing machine is also waiting for a home somewhere in my studio. I have been very drawn to quilting books lately so it might come in handy for some future pieces.

Here is the beading command center. My mosaicon hangs in a place of honor above my table. I enjoyed creating that piece so much! Resting on the portable storage units are a couple of beautiful Native American design needlepoint pieces created by my Mom.

I store most of my seed beads in the Tic Tac style storage containers. They’re sorted by color and placed into clear rectangular storage units, fitting quite nicely together. I also have a lot of tubes that I store in a pen caddy. Each 3-sided unit is standing up on the table next to the wall.

This weekend I will be looking for a task chair and some lights! Stay tuned for more studio stories…

The Birth of a Studio, Part 1

Where shall I begin?

I started bringing my art supplies over to my new home a couple of weeks ago. I was very lucky that I had time to do that instead of having to get it accomplished all in one weekend. However, now that I look back, it might have been a good idea to set up the structure – shelves, tables, portable storage – first before I dumped everything in the room. Now it looks like this.

The room is actually a downstairs family room in a split level house. There’s even a brick fireplace on the left hand wall behind where I was standing when I took the photo. I can have some nice cozy fires in the wintertime while I work. A couple of months ago this room was walled with dark wood paneling. I think the “slipper shell” color we painted it really brightens the room. My studio space is approximately 11′ x 12′. I’d like to have 3 work areas for beading, polymer clay and metalwork. This weekend I’m going to take a ride over to BJs to check out their portable tables. I’d like to purchase two 6 foot tables, one for beadwork and one for polymer clay. I’d love to find a jeweler’s bench for the metalworking area. A good friend suggested that I make paper cutouts of the components for my studio area and play around with placement. I love that idea and will probably play around with that this week before I get my tables. So, step one is to make paper cutouts to determine how the structure of my studio area will be setup.

Libby Mills has been interviewing artists and their studios in her blog posts, Studio Snapshot. You can read the latest one here. Knowing that I was setting up a new studio area, I’ve been avidly reading every interview. Two important considerations that have been consistent in each interview is lighting and the ability to face outside (if you can) while working. As you can see from my photos, I do have a sliding glass door leading out into the backyard. There’s a wooden deck over it so that does limit the light. Right now I just have one portable OTT lite so I’ll have to invest in more lighting.

Does anyone know where I can purchase a wooden jeweler’s bench?