Prayers for Peace

Prayers For Peace Necklace 1

Whenever I turn on the news, it seems like there’s more and more violence happening in the world. I always feel so helpless in the face of all of the sadness and suffering going on. What can I do to help? I am one person, living a quiet, middle-aged life in my little corner of this world.

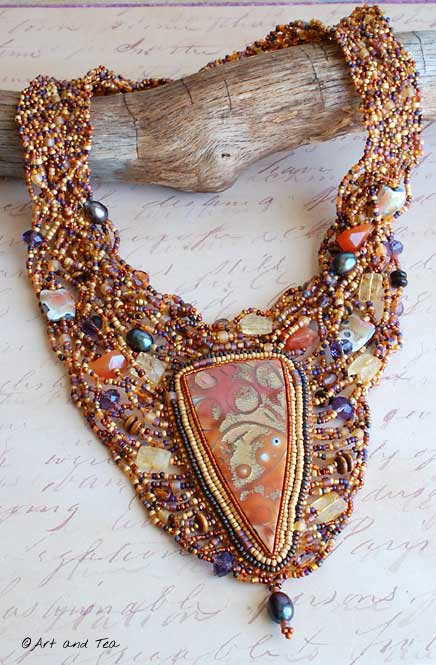
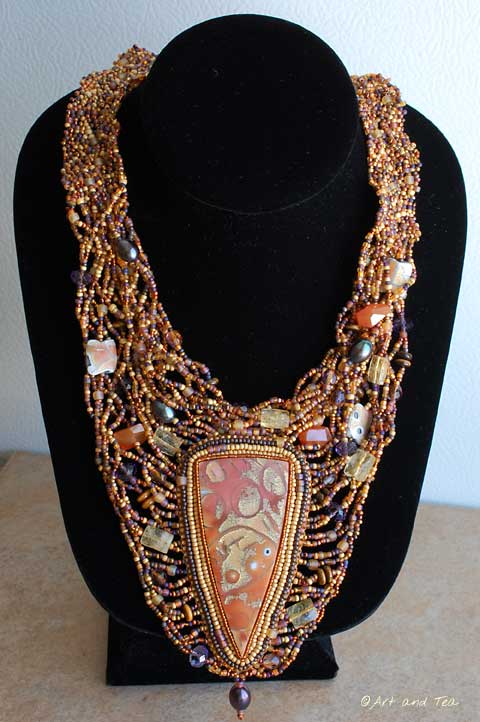
I thought about this as I beaded the triangles for this necklace, one by one. As I got into the meditative rhythm of adding one bead at a time, I found myself moving to a deeper place, a silent place, and I started to send out positive thoughts and prayers for healing. On the path of those thoughts and prayers, this necklace was born. I call it Prayers for Peace.

Prayers For Peace Necklace 2

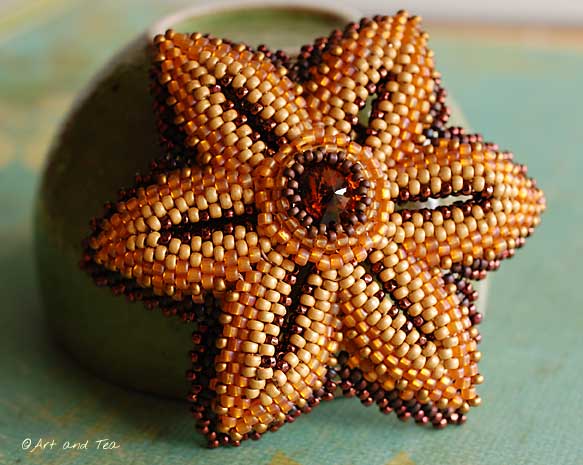
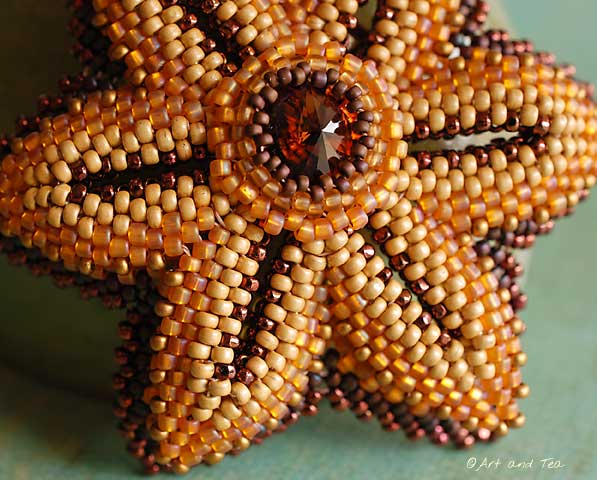
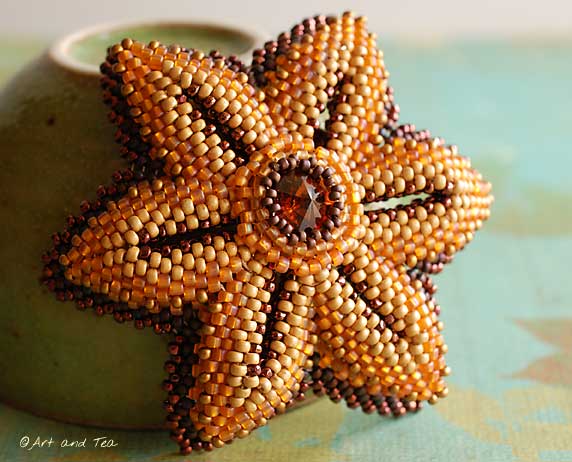
I was inspired to create these beaded triangles when I received my copy of the wonderful Contemporary Geometric Beadwork by the fabulous Kate McKinnon and her beady tribe.

I started out with an exploration of colors and patterns.

Beaded Triangles

I then moved on to the creation of a more organized beaded piece – a necklace.

Prayers For Peace Necklace 3

I chose a warm color and a cool color to represent the energies of light and dark and the healthy balance of these energies. Like yin and yang.

Prayers For Peace Necklace 4

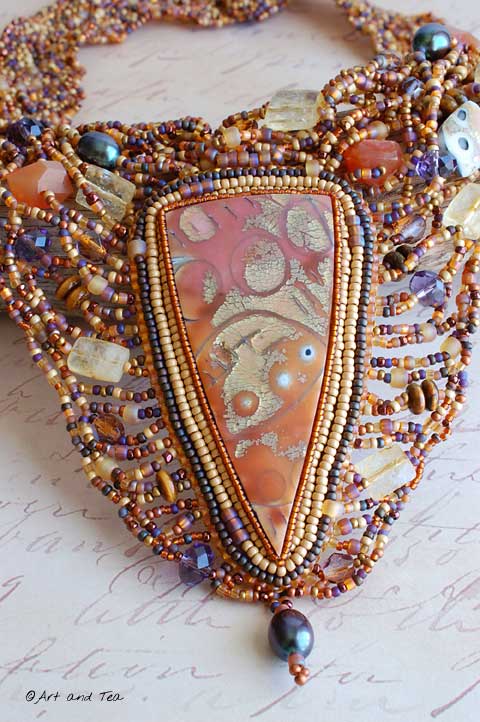
The biggest challenge with this piece came after I had beaded all of the triangles. Now how do I connect them together to form a necklace? I thought about this for awhile and had come up with several options when one day I experienced a serendipitous moment whiling creating some headpins with silver wire. How about if I use a headpin as a sort of hinge attachment? And it worked.  Most excellent.

Prayers For Peace Necklace 5

Using the same headpins, I then created some chain links and a triangle shaped clasp link.

I’m really enjoying my foray into the geometric beady world these days. Stay tuned for further adventures as I explore beading a cuff with “horns and wings”. Think Klingon warrior and the colors of tea!

“We have to continually be jumping off cliffs and developing our wings on the way down.”

~Kurt Vonnegut

The Evolution of a Beaded Flower Pin

Moms Beaded Flower Pin 2 09 07 13

Hey wait, that isn’t a photo of tea leaves! I know, I know, it’s been many moons since I’ve shared one of my creations with you. I seem to have slipped into a quiet, inner space of creativity this year, a space I feel myself slowly peeking out of.

This pin had an interesting evolution.

Earlier this year, I received my copy of Contemporary Geometric Beadwork, Volume 1 by the fabulous Kate McKinnon and her amazing beady tribe. Using the instructions in the book, I taught myself how to zig zag, an MRAW (Modified Right Angle Weave) stitch that then morphs on into peyote stitch. The zig zags are formed by an increase and decrease at regular intervals. If you love to bead and don’t have the book yet, run to the link above and order it. You’ll be glad you did.

Moms Beaded Flower Pin Closeup 09-07-13

So, zig zags to create a cuff bracelet. All was going well until the zigs got ziggier and the zags got zaggier and the whole cuff shrunk and was way too small to fit over my hand. Oh dear, lesson learned. Pay attention, Karen. Measure, Karen.

Moving forward, now what was I going to do with this too small cuff, I wondered. In thumbing through the book some more, I discovered that you could do some strategic weaving to pull the shape into a starfish or flower shape. Brilliant!

And a flower pin was born.

Moms Beaded Flower Pin 1 09-07-13

Once I wove the zigs (or was it the zags?) together, the middle looked kinda empty so I beaded around a topaz rivoli crystal and ta-da – a sparkly flower center was born. Did I mention that you can make two layers on this type of beadwork? It gives the structure more dimension and strength.

Moms Beaded Flower Pin 3 09-07-13

After all the beadwork and weaving was done, I sewed a pinback on and covered it with a small scrap of ultrasuede. I gave it to my Mom for her birthday.

And now that my Mom has received her gift and it goes perfectly on her new fall sweater, I can share it with all of you!

As always, thanks for stopping by and stay tuned for more creations in Geometric Beadwork.

Albuquerque Sky

AlburquerqueSkyFull2031013

In the fall of 2010, I traveled to Albuquerque, NM to visit my son and his family a week after my precious grandson, Landon, was born. Landie had surgery when he was only one day old so it was a challenging time for our family but it was also a celebratory time as his healing was going very well. He came home from the NICU the day after I arrived there. I spent a wonderful week getting to know my courageous little grandson and also having loads of fun with my beautiful granddaughter, Ella, then 2 years old. Her exuberance and excitement infused my life with a breath of fresh air. It still does!

One evening, my son and I went out to pick up dinner at a traditional New Mexican style restaurant. I wish I could remember the name of the place because the food was excellent. Anyway, as we turned west onto a main thoroughfare, I looked up and I distinctly remember that my jaw literally fell open as I beheld the sunset. The whole immensity of the western sky was ablaze in brushstrokes of fiery orange, shimmering gold and twilight purple. We have great sunsets here in New England but with our hilly terrain and lots of trees, you see a much smaller portion of the sky. Here in the flat desert landscape of New Mexico, the sky was a huge expanse, saturated with color.

AlburquerqueSkyFull031013

That experience inspired me to create this necklace, which I have named “Albuquerque Sky”. I made the polymer clay focal with my favorite mokume gane layering, this particular one being Barbara McGuire’s Shimmering Gold technique using gold leaf, translucent clay and alcohol inks. Even the name is perfect. Yummy.

AlburquerqueSkyCloseup03101

Starting with the sunset image that had been emblazoned in my imagination on that fall day, I chose my seed bead color palette with the aid of Beverly Ash Gilbert’s “Eye for Color” color wheels. They’re a wonderful artist tool for creating “bead soup”, as Beverly calls it. I’ve created bead soup before and wrote about it here and here.

I was also inspired by her netting technique for beading necklaces. For my freeform beaded pieces, I usually use a one-bead peyote stitch and sometimes use multiple beads in one stitch or to create “bridges” within my work. Beverly’s technique uses 3 beads in one stitch, which I found worked up much faster. That said, this necklace took many hours to complete. I don’t mind. I love the process and find it meditative and soothing.

AlburquerqueSkyFull3031013

I bead embroidered around the focal and then improvised a netted frame around it. Instead of fashioning a clasp from beads or wire as I usually do, I sewed on 2 dressmaker’s snaps, which are hidden when the necklace is closed. Another inspiration from Beverly, thank you!

This necklace is the manifestation of a treasured memory, one I will always hold dear in my heart. As always, thanks for stopping by my little corner and allowing me to share my work with you!

“Memory is the diary we all carry about with us.”  ~Oscar Wilde

Spacetime Necklace

A fusion of an earthy past with an abstract future in the spacetime continuum, this necklace is completely out of the box for me. None of the “out of the box “steps came easily, in fact, one could even use the word “struggle.” I had an image in my mind that I didn’t quite know how to go about manifesting, especially the way I wanted the lentil beads to hang with the stone jasper spears.

The polymer clay lentil beads were formed from a caned sheet I had made after a demo at a polymer clay guild meeting a couple of years ago. I used one of those beads in my “Spacetime” bracelet, posted about here.

Instead of drilling a hole through the beads themselves, I attached a piece of clay to the back and wired through that so the spears would appear a bit recessed from the lentils.

The hand-forged copper chain was inspired by 2 of my favorite wire artists, Cindy Wimmer and Kerry Bogert. The copper clasp came out of my clasp treasure box, created earlier this year in Deryn Mentock’s online class, “The Art of Closure.”

As always, thanks for visiting  and sharing in my creations!

Ripe Berries Necklace

As it happens with a lot of my creations, I start out by playing with a technique or a concept and then it evolves into something entirely different. Such it was with my Ripe Berries necklace.

About 4 years ago, I was experimenting with creating a beaded tube using herringbone stitch, one of my favorite beading stitches. You can read my thoughts about that stitch here. I beaded a 6-inch length of tube, played with some ideas, none of which inspired me and then that tube sat in my studio until a couple of months ago when I picked it up again. Does that ever happen with your creative process?

As I played around with the tube and some gemstone beads, I began to think of how much I enjoy taking a palette of beads and creating one of my fringy bracelets, which I have been making for over 10 years now. You can see one of my bracelets here. I start off by stringing a length of size 8 seed beads and then I add a beaded fringe in between each bead. It’s a wonderful way to bring together an eclectic mix of beads and you can make the fringe as thick or thin as you want.

Anyway, how about if I added fringe to the tube, with the gemstone beads I had gathered? And that’s just what I did! However, instead of adding longer fringe as I usually do, I just added one bead at a time for a tighter, encrusted look. If any of you have seen Laura McCabe’s beautiful beadwork, that was definitely an inspiration for me.

It took many hours to add all of the beads but I am quite happy with how it turned out! A strand of amethyst rondelles along with a sterling silver box clasp finishes the necklace.

This necklace is one featured on the homepage of my new portfolio website created in the website design class I’ve been taking with the fabulous Susan Lomuto. I invite you to take a look at Karen Park Studio and welcome any feedback.

As always, thanks so much for visiting and sharing in my artwork!